Follow the instructions on this page to create a new zap or automate Tango's workflow in Zapier. Zapier enables you to link more than 1,300 web apps and easily pass information between them with workflows. Automate the task of sending digital gift cards within your existing workflows and applications by using Tango's web app in Zapier—no coding required!
Once you're ready, learn how to create a new Zap:
- Log in to Zapier.com.
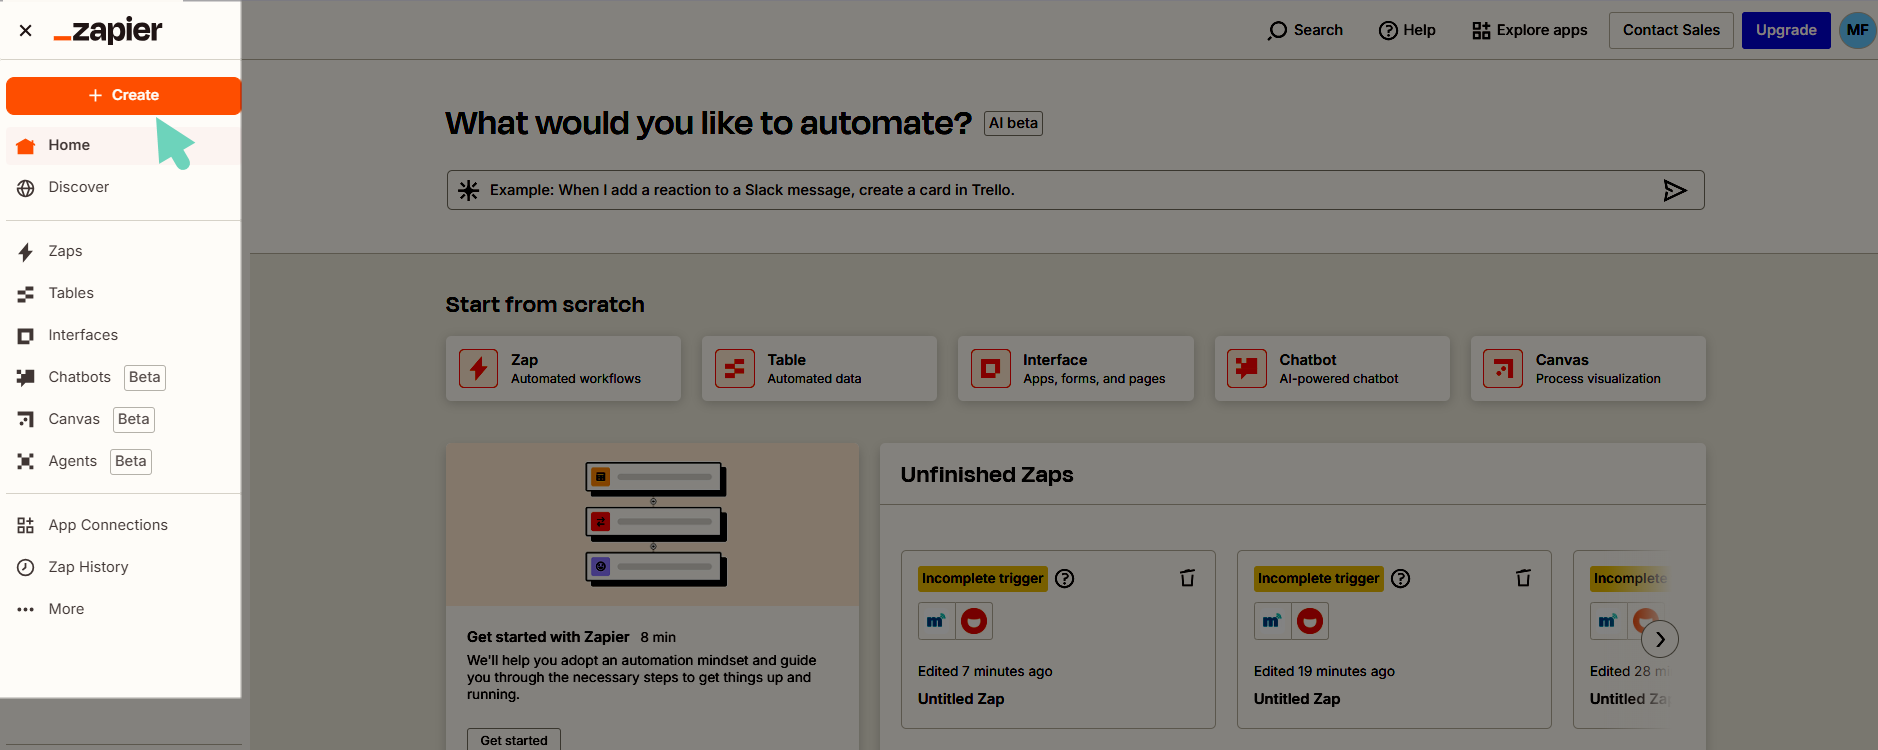
- Click + Create > Zaps and start customizing.
A Zap has two parts: a triggering event and a resulting action like an “If This, Then That” automation. A connection to Tango is used for the resulting action (to send a reward), but first you must define a triggering event to start the process.
The triggering event can be something that happens routinely, like an anniversary date, a unique event in another app, or a lead getting converted to a contact. When using another app as a trigger event, you need to authorize the app through Zapier and define the event before moving on to creating an action with Tango. You can learn more about the Zap editor and setting up a Zap trigger in the Zapier documentation.
To configure a trigger:
- Log in to Zapier.com.
- In the Zap editor, click Trigger.
In the search box, select an app from the list of Zapier compatible apps and tools. The setup tap opens.
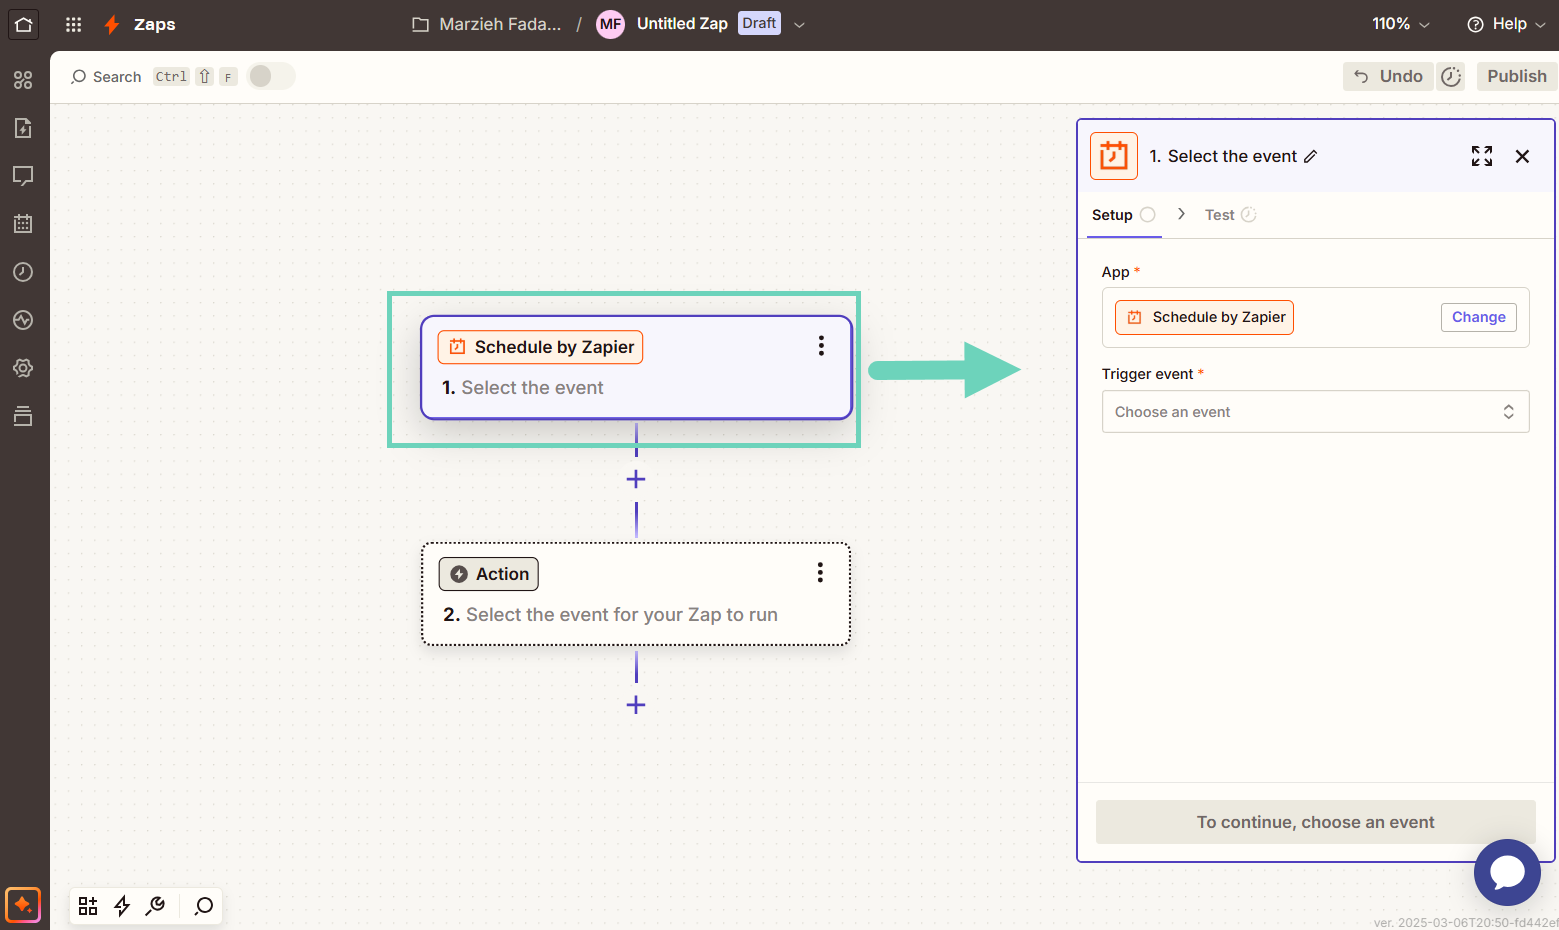
- In the setup tab, click and select a Trigger event from the list, such as “Schedule by Zapier”.

- Configure your trigger and click Test trigger.
You now need to configure action which is sending rewards by Tango. Once configured, authorize Tango through Zapier then test the event.
Note:
We only support email-based reward delivery with this integration.
To configure an action:
- Log in to Zapier.com.
- In the Zap editor, click Action.
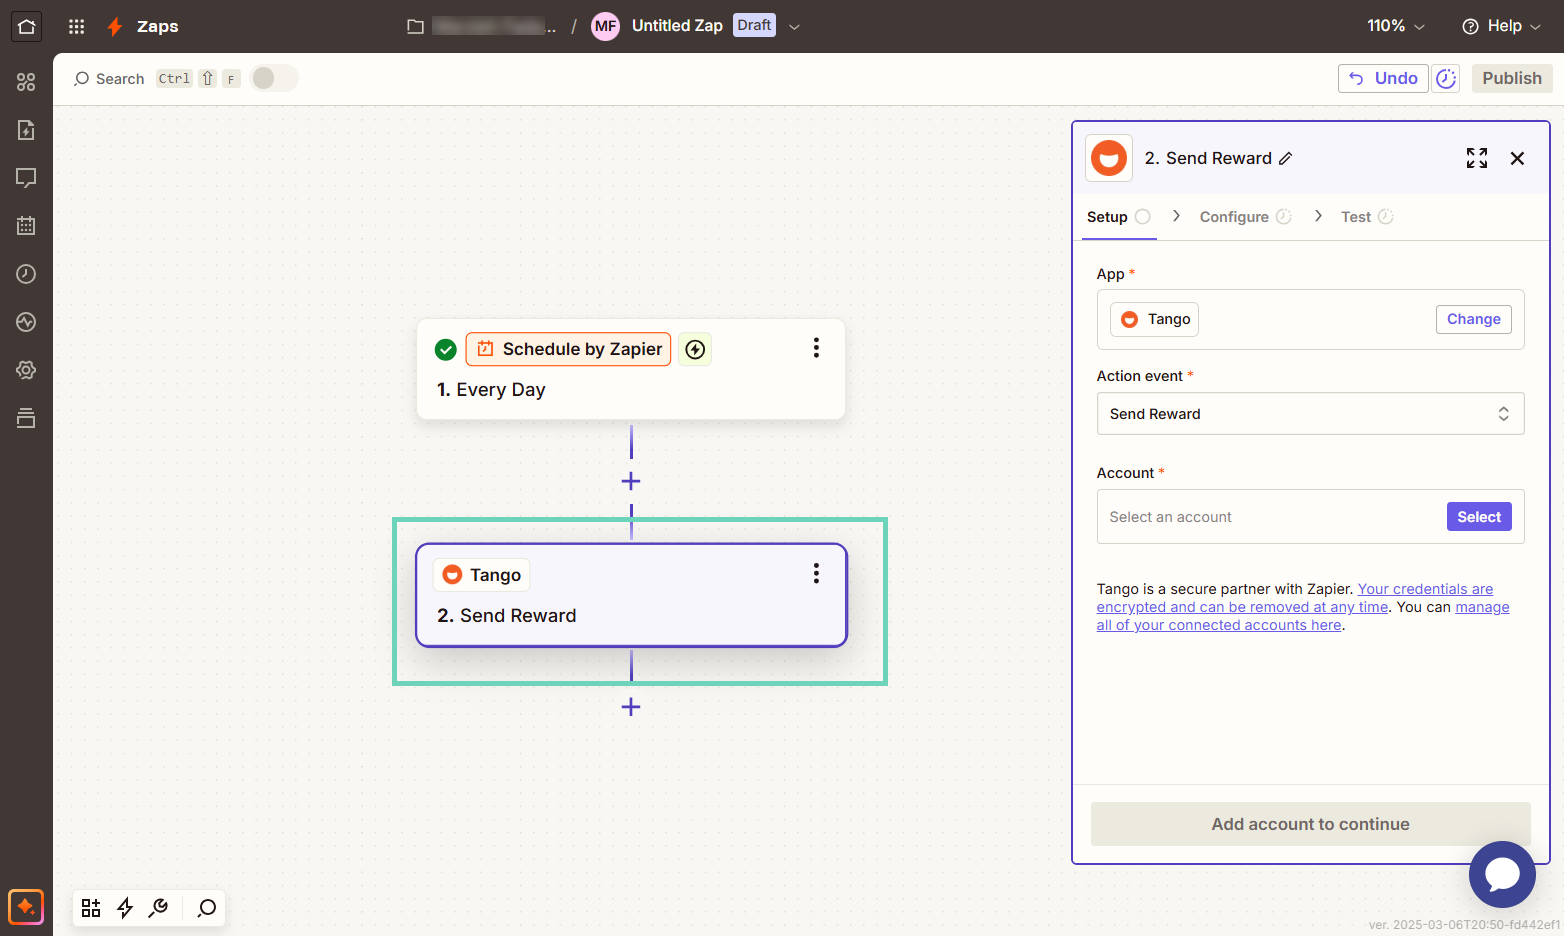
- In the search box, select
 Tango from the list of Zapier apps and tools. The setup tap opens.
 - In the setup tab, click Action event.
- Select Send Reward.
- Click Account in the setup tab:
- If it’s your first time connecting Tango to Zapier, click Connect a new account. Other platforms added manually will appear in the list and will continue to work until the API key changes.
- If a Tango platform has been connected to Zapier before, you can see its name and environment in the list which can be selected for this zap or when editing the zap.
- Click Continue.
- If you choose to connect a new account, you need to allow Zapier to access your Tango account.
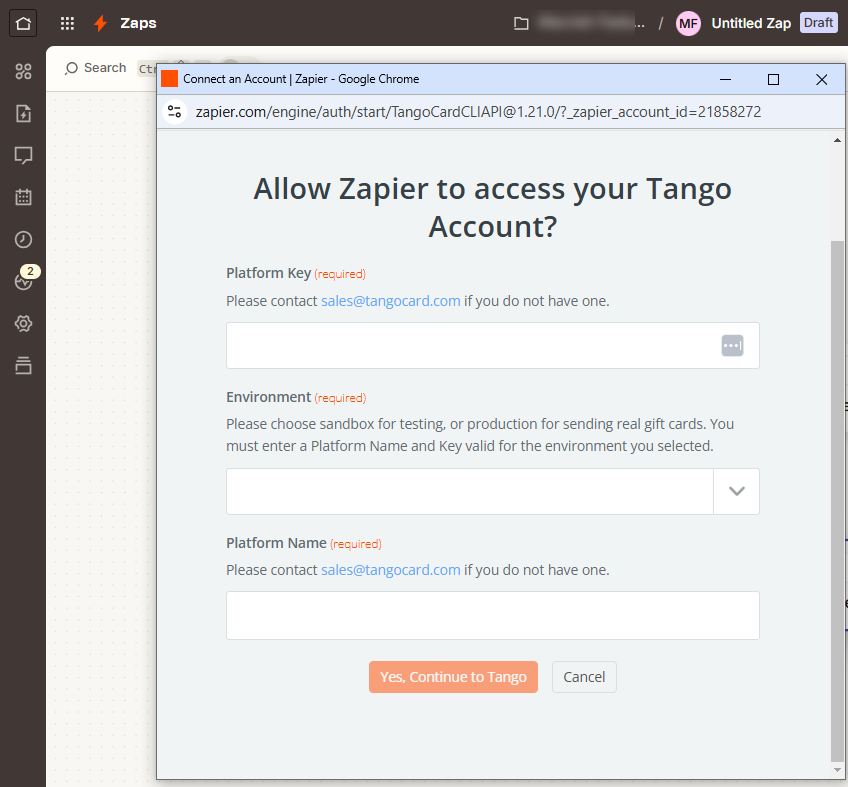
Enter the following information. You can find them in your Tango portal:
If you don't have a Tango sandbox platform, use the following values to test your Zapier connection. Sandbox environments do not store real funds:
|
Fields
|
Test value
|
|---|
| Platform name | ZapierDemo |
| Environment | Sandbox |
| Platform key | WEzIsMS$j@Rybc?GE?PA&&LUHCcBgG?mQtjd@pRm&ksw |
- Click Yes, Continue to Tango. You’re connecting Zapier to your Tango platform.
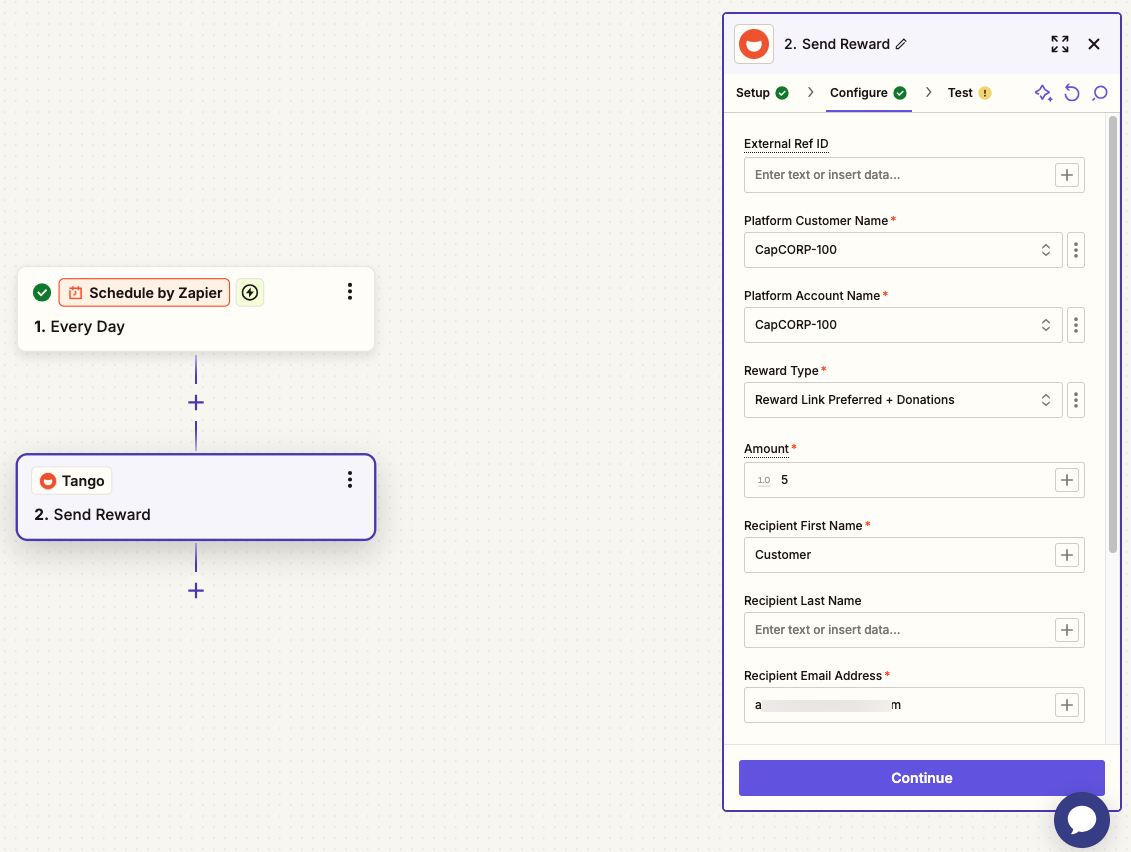
- Upon connecting to Tango, a configuration window opens. Enter the following values:
|
Field
|
Purpose
|
|---|
| External Ref ID |
A unique, dynamic, idempotent field that can be used for Zapier users. This field is optional but highly recommended to prevent duplicate rewards being sent out.
The Ref ID is used as the order’s cross reference and prevents accidental order duplication.
External Ref ID is returned in the order response, order details, and order history. The length is 0 to 100 characters.
Use “field mapping” to make sure External Ref ID is dynamic (not static or the same value) and changes based on factors, such as date, time, reward sent, recipient information, etc. Using static values fail sending rewards.
|
|
Platform Customer Name
|
The Customer (Group) name of the Group containing the account from which you want to send rewards with Tango.
|
| Platform Account Name | The name of the account from which you want to send rewards with Tango. |
| Reward Type | Choose a reward from list of all rewards available to send from your Tango platform. By default, all Tango platforms come with a Reward Link. Reach out to your Customer Success Manager (CSM) or success@tangocard.com if you'd like to add more rewards to your Tango gift card catalog. |
| Amount | The reward amount sent with the action. This can be static or linked to information in the Trigger step of the Zap. |
| Recipient First Name | The first name of the recipient of the reward. This can be static such as "Customer" or "Recipient", or linked to recipient information in the Trigger step of the Zap. |
| Recipient Last Name | (Optional) The last name of the recipient of the reward. This can be static such as "Customer" or "Recipient", or linked to recipient information in the Trigger step of the Zap. |
| Recipient Email Address | The email address where to send the reward. This can be static or linked to information in the Trigger step of the Zap. |
| Email Template ID | The unique alphanumeric identifier for the Tango Email template you'd like to use to send the reward. The Standard Tango Email Template is available for use with every platform, and uses the ETID E000000; this Email template will be used if this field is left blank. Learn how to Create a custom email template. |
| Message |
- Message is used with the template and is included with all rewards using this Zap.
- Message can be customized like other fields using field mapping to personalize it to specific recipients, however we DON’T recommend hard-coding personal or recipient-specific information into this message field.
|
| Notes | Is used for internal tracking, such as employee ID or department number. It shows up on your rewards report, but not on the actual reward. The customer notes are not visible for the recipients. |
- When all required fields have been filled out, select Continue.
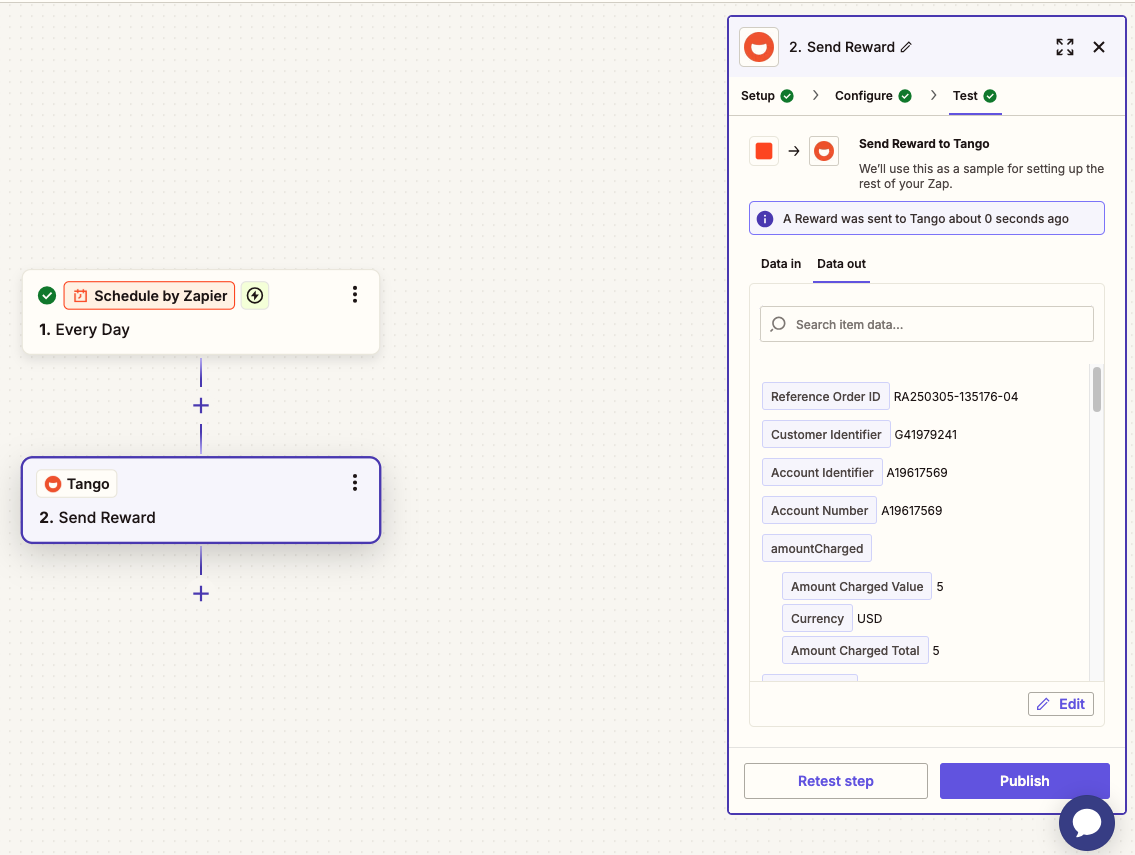
- Click Test step.
You confirm that Zapier has established a connection and is able to send rewards with Tango. A successful test will show a confirmation banner at the top.
Note:
We recommend testing in Sandbox first before implementing the Zap in your production environment. Running a test from a Production environment will send a reward with real money.
- Click Publish to finalize your Zap.
The confirmation window appears when the Zap is published.
View your Zap
You can easily view your created Zaps from the dashboard.
- Log in to Zapier.com.
- Click a Zap from the list. You can toggle the Status Off and On.
- Use the three-dots menu
 to make changes, such as rename or move Zaps to the folders in your Zapier account.
 - To edit the Zap from your dashboard, click on the Zap’s name.
- Click Edit draft on the top right.
More resources

