Now that the connection is created, you need to add the Create record object to a HubSpot workflow to send rewards to your recipients. To set up workflows and define triggers, see HubSpot’s guide to creating workflows. To learn more about Tango groups and accounts, ETID, and UTID, visit the Tango help center.
Before you start
Before you start, collect the following information from the Tango portal:
-
Tango template ID (ETID). If you create a custom email template, your platform will have additional Template IDs to choose from. See how you can create a custom email template.
-
Group Identifier
-
Account Identifier
-
UTID (a Unique reward Identifier)
Set up the workflow
This section walks you through creating a new HubSpot workflow and opening the action menu.
To set up the workflow:
-
Log in to your HubSpot account.
-
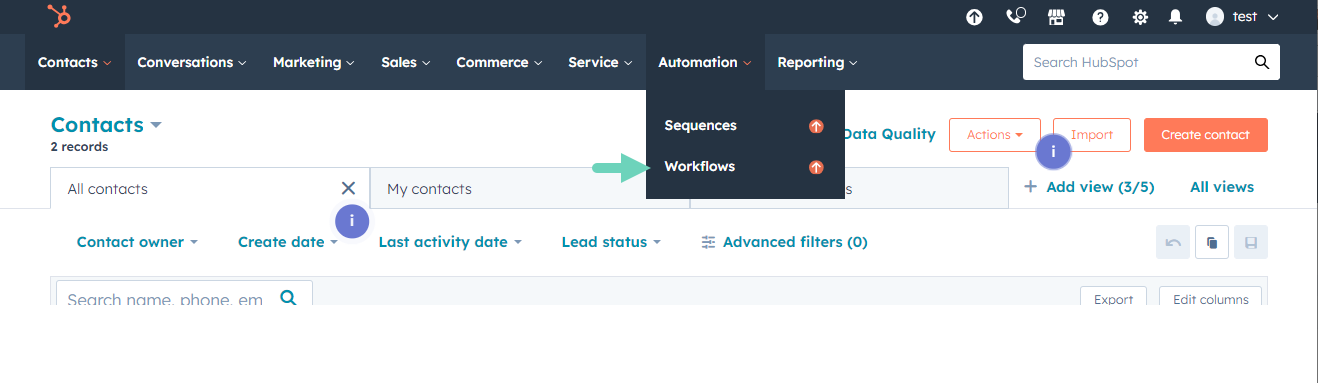
Go to Automation > Workflows.
-
Click Create workflow > From scratch on top right to create a new workflow.
See the HubSpot help center to learn how to Create workflows.
-
Click  inside the workflow to open the Choose an action menu.
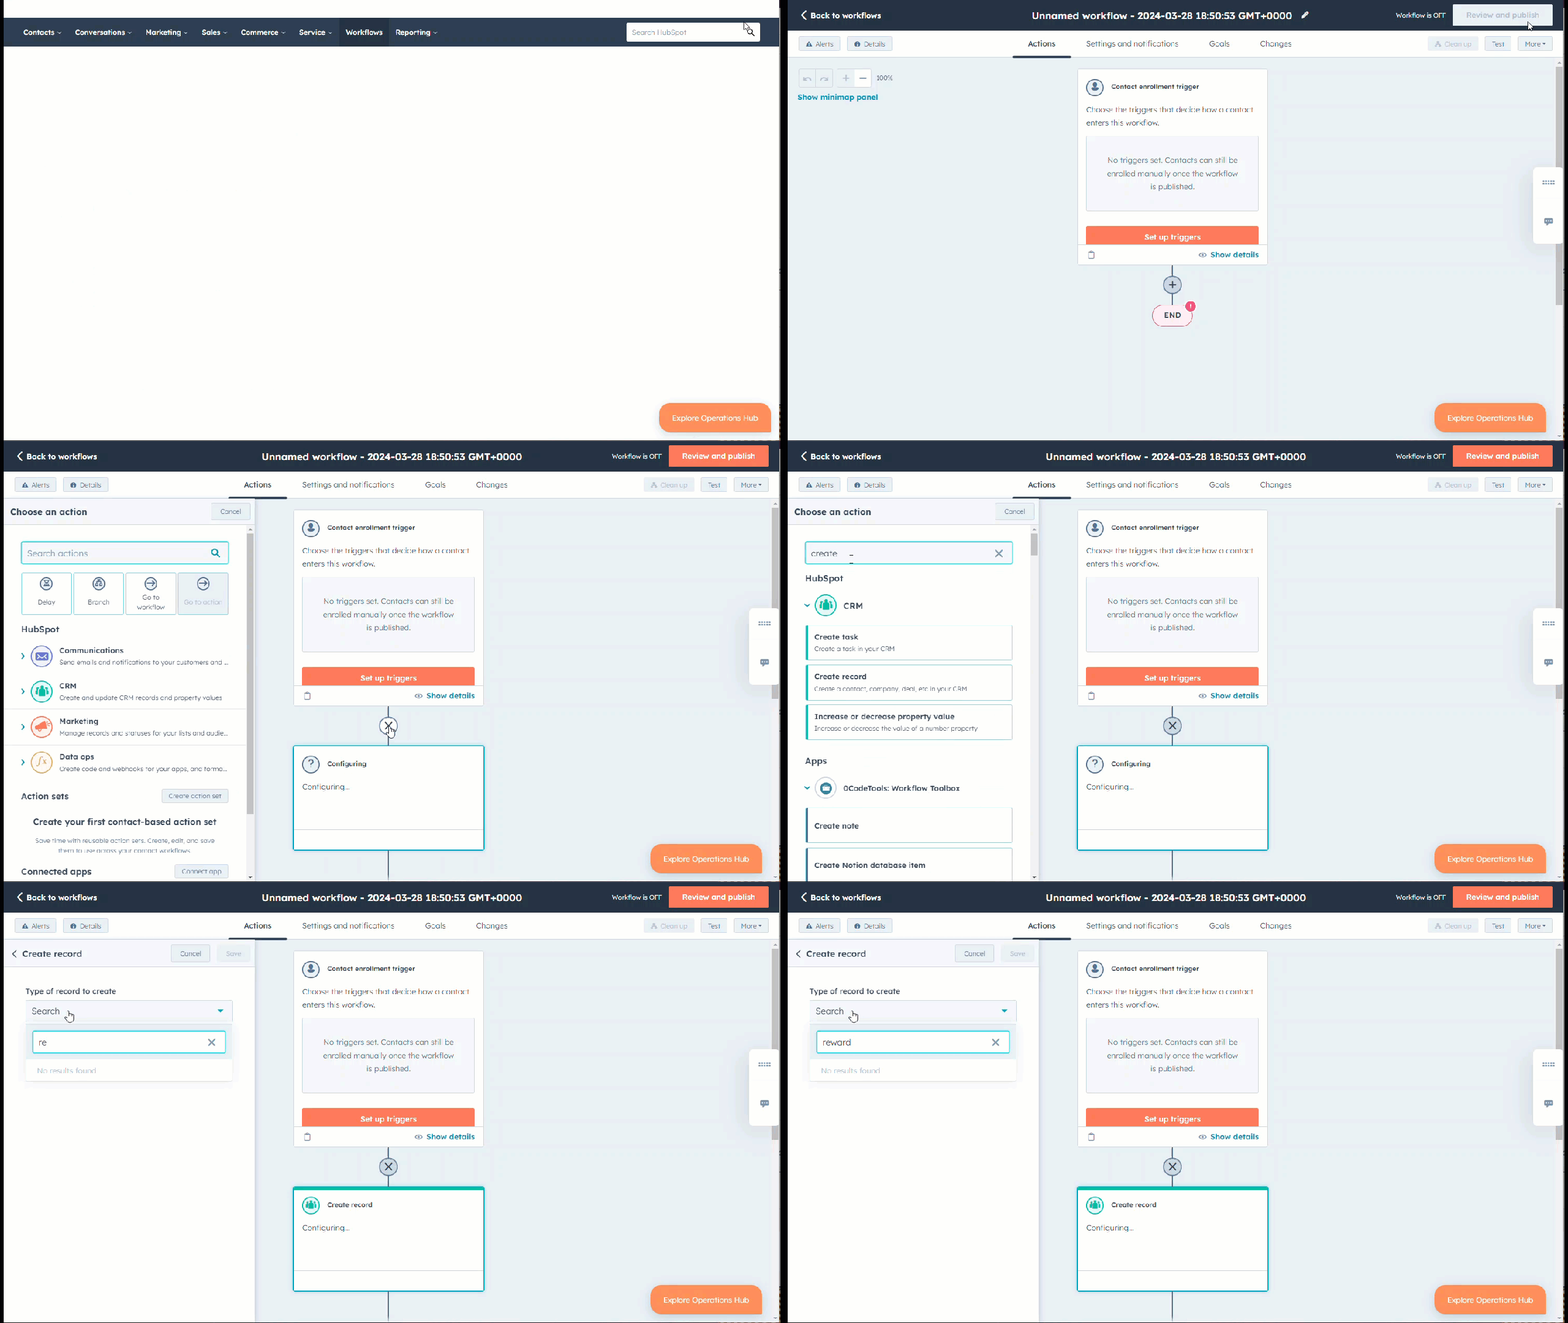
Use this section to add the Create record action and select Reward as the record type.
To configure the Create record action:
-
In the search field type Create record and select it. Create record allows you to create a contact, company, deal, etc. in your CRM.
-
Select Reward for Type of record to create.
-
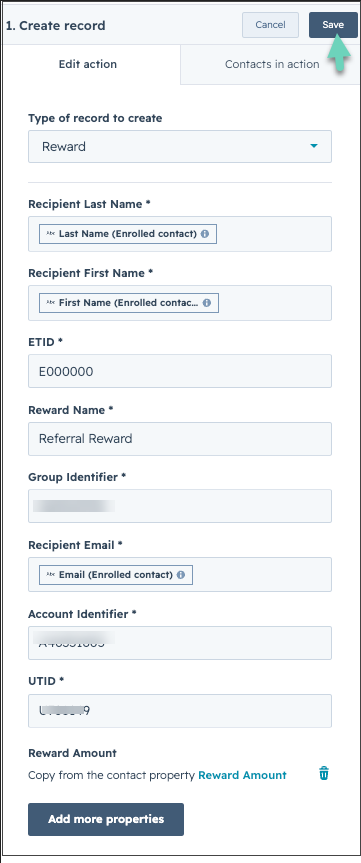
Enter the field values based on the table below:
|
Fields in Hubspot
|
Description
|
|---|
|
Recipient Last Name
|
Select last name in the HubSpot contact property from the Available data menu to the right.
|
|
Recipient First Name
|
Select first name in the HubSpot contact property from the Available data menu to the right.
|
|
Recipient Email
|
Select email in the HubSpot contact property from the Available data menu to the right.
|
| From Tango portal | |
|---|
|
Template ID
|
Copy the Template ID (formerly ETID) that you want to use for this campaign from inside your Tango platform. See where the email template is located. See What is an ETID.
|
|
Group Identifier
|
Copy the Group Identifier from inside your Tango platform by going to Accounts > Group details. The Group Identifier is associated with the account you want to use for this campaign.
|
|
Account Identifier
|
Copy the Account Identifier from inside your Tango platform by going to Accounts > Account Details. Account Identifier is associated with the account you want to use for this campaign. See how to find your Account Identifier.
|
|
UTID
|
Copy your unique Tango ID from inside your Tango platform. Go to Send rewards and select the reward you want to use in this campaign then click the link View all reward details.
|
|
Reward Amount
|
Enter the value of the reward you wish to send. Currency will match the UTID or reward selected.
-
Entering “10” translates to a $10 USD reward when selecting a US-based reward, and “1200” translates to a ₹1200 INR reward when selecting an India-based reward.
-
Make sure the amount you select is compatible with the minimum and maximum values of the reward you are sending.
|
|
Reward Name
|
This field is for your internal use and reporting only. Enter a name to help you identify this reward in your HubSpot records.
|
Review required field values
Review this section to confirm the required Create record fields are completed correctly. The following image illustrates the required fields under Create record in HubSpot:
Publish the workflow
Complete these final steps to save, review, and turn on your HubSpot workflow.
To publish the workflow:
-
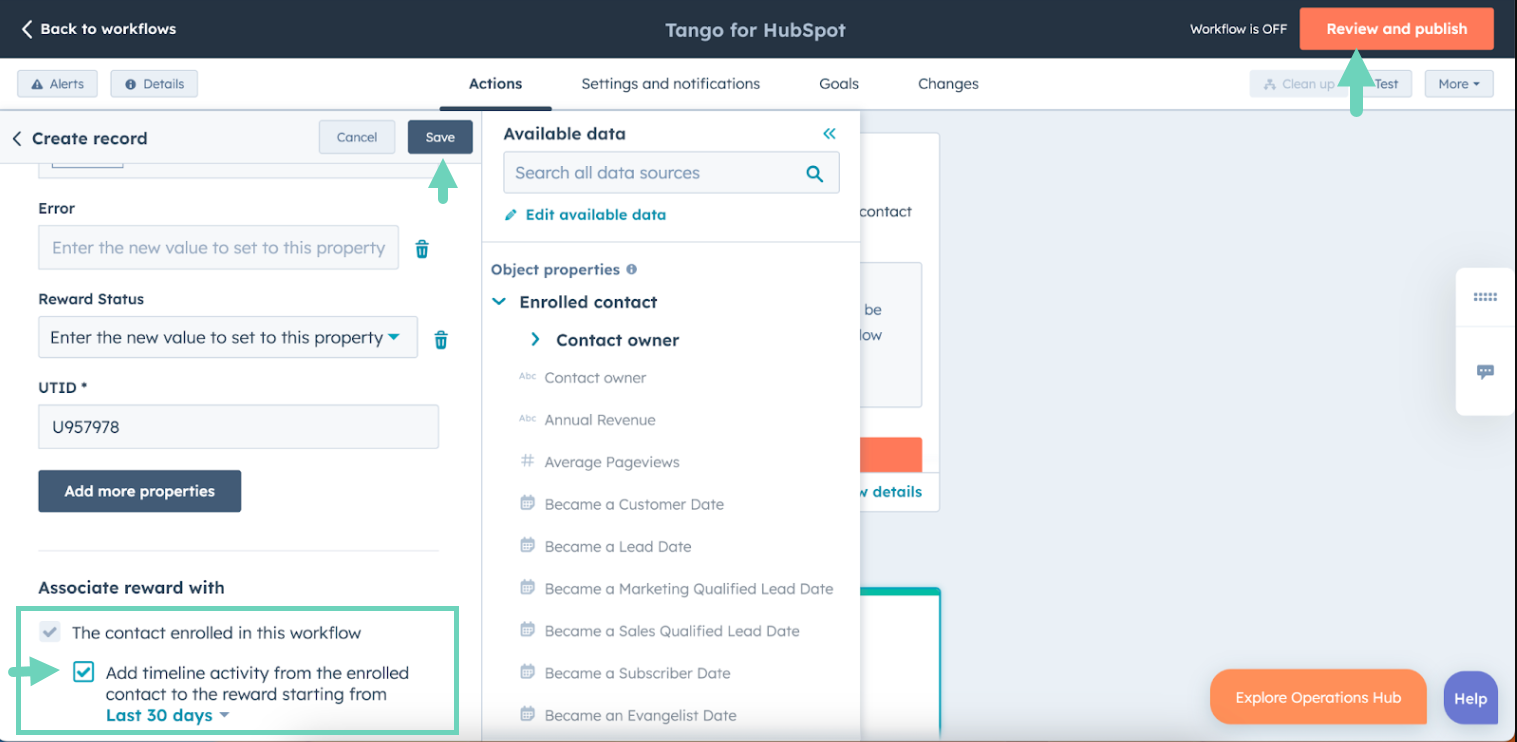
Select the check box Add timeline activity from the enrolled contact to the reward starting from, and then select the appropriate time period if you want the Reward to appear in the Contacts activity timeline.
-
Click Save.
-
Click Review and Publish on top right.
-
Click Turn On. Your workflow is up and running. You are now set to send rewards with the creation of this workflow. See HubSpot instructions on how to Create workflows.
What’s next?
Next, set up error email notifications so your team is alerted if a reward fails to send or a workflow error needs attention.