To enable reward management controls—including Freeze, Unfreeze, Cancel, and Cancel & Reissue—for Tango rewards directly within the Tango app in Salesforce, you must configure the required picklist values during the app installation process. Follow the steps below to add the necessary values to the Reward Status Global Value Set.
Note:
Reward management controls are available only in Tango Salesforce App version 1.59 or later.
-
Log in to your Salesforce account as a Salesforce admin.
-
Go to Setup.
-
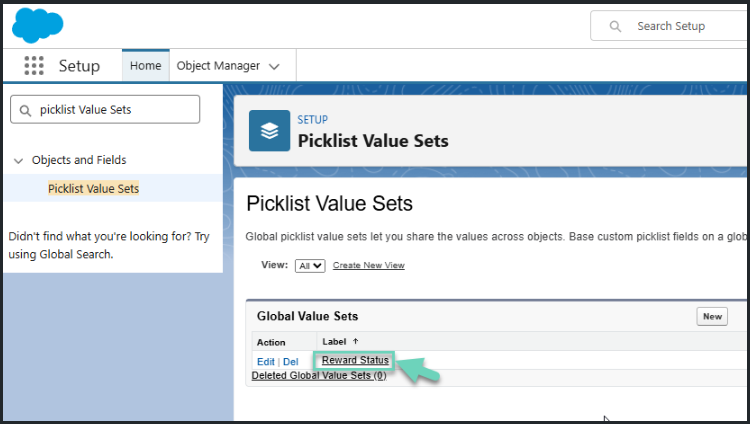
In the Quick Find search box, type Picklist Value Sets and select it from the results.

Step 2: Search and select “Picklist Value Sets”
-
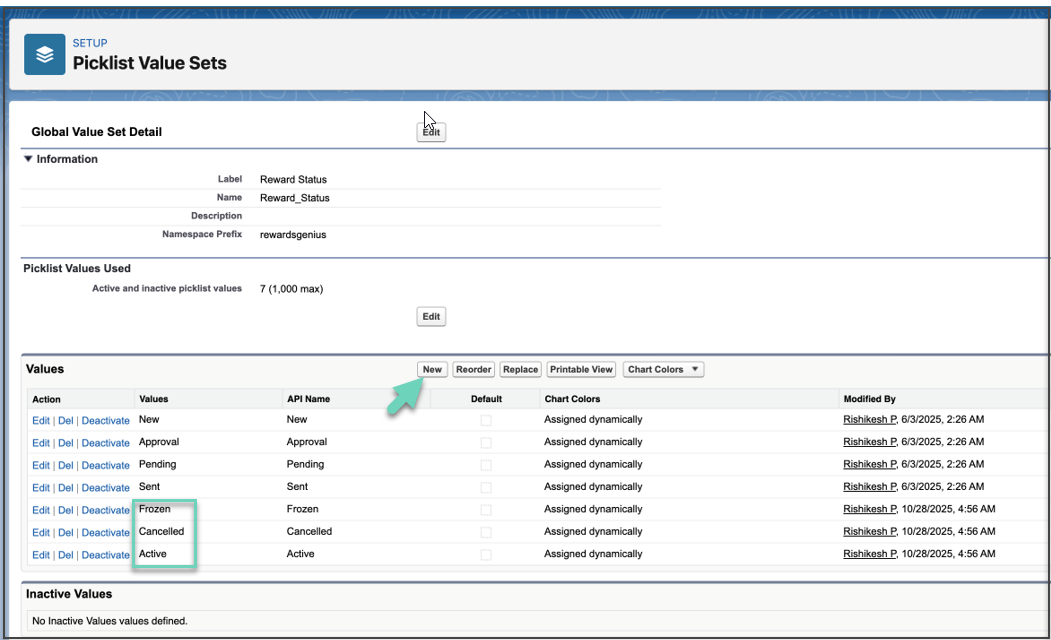
In the list of Global Value Sets, click Reward Status.
-
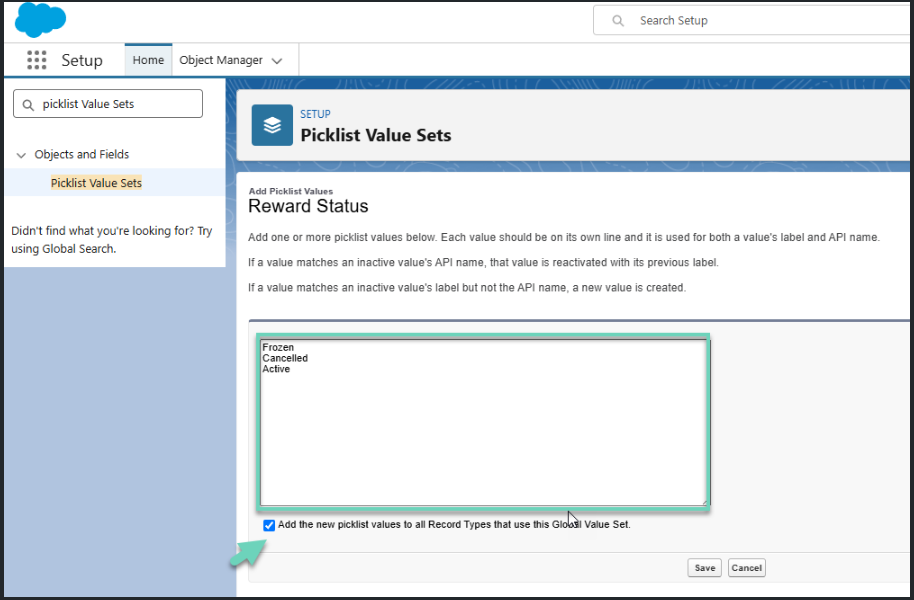
In the Values section, click New.
-
Add the following three new values (one per line):
-
-
Frozen: indicating a reward is temporarily on hold.
-
Cancelled: indicating the reward is no longer valid.
-
Active: indicating the reward is currently valid and usable.
-
Select the checkbox: Add the new picklist values to all record types using this global value set.
-
Click Save.
-
Confirm that Frozen, Cancelled, and Active now appear in the list of values.
Step 3: Verify the Status field on the Tango Reward object
-
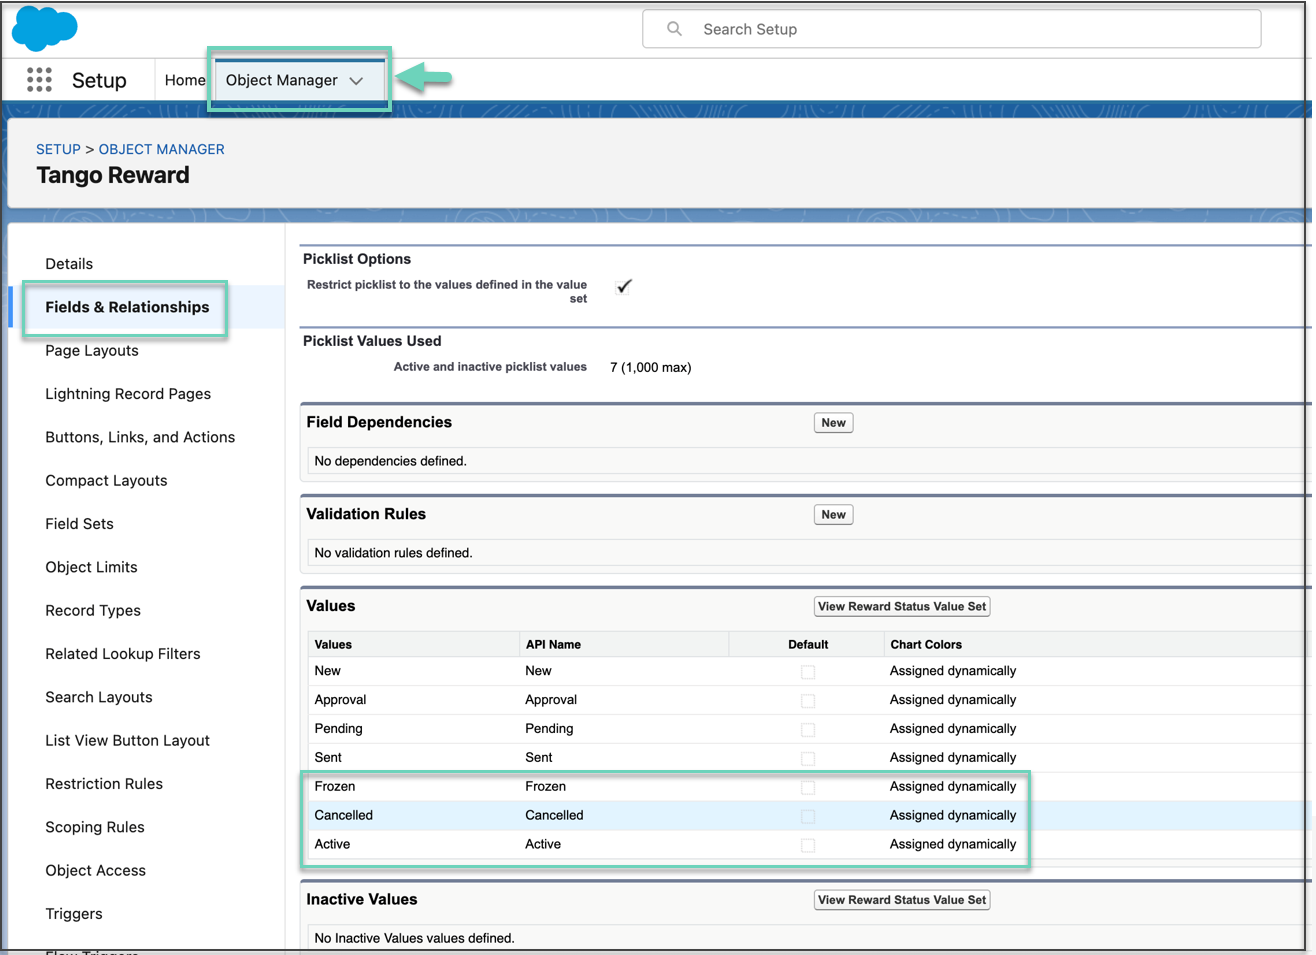
From Setup, go to Object Manager.
-
Select Tango Reward (or open it directly via the object link).
-
In the left-hand navigation, select Fields & Relationships.
-
Search for and select the Status field.
-
Scroll down to the Values section and verify that the following values are present: Frozen, Cancelled, Active.
Once these values are configured and visible on the Status field for Tango Reward, the reward management controls (Freeze, Unfreeze, Cancel, and Cancel & Reissue) will be available within the Tango Salesforce App (v1.59+).
What’s next?
Your next step is Step 4: Add Tango to the Salesforce object.
More resources:

